How To Use The Javascript Timing Events
This technical article provides a useful guide to the implementation and use of the Set Timeout and Set Interval functions in JavaScript.


It is no secret that many programmers tend to have difficulties when using the Javascript timing events, this is a result of the programmer not having enough background knowledge of the applications or use of the function. In this short article, we will look at one way to implement the timing event functions in our code.
Prerequisites
Basic knowledge of HTML and CSS
Basic knowledge of Javascript
What is a timing event?
The timing event in Javascript is a function that executes a piece of code according to the time specified in the code snippet. The Javascript timing events normally take in two parameters which are the function parameter and the time parameter(measured in milliseconds). e.g
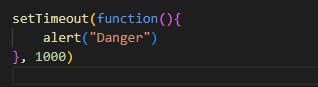
According to the code snippet above, an alert signaling "Danger" pops up on the browser window exactly 1000 milliseconds (1 second) after the content has loaded on the screen. Thus, one second after the function is called, it triggers a popup on the screen displaying the message "Danger".
Types of timing events
In Javascript, there are two types of timing events namely:
Set timeout method
Set interval method
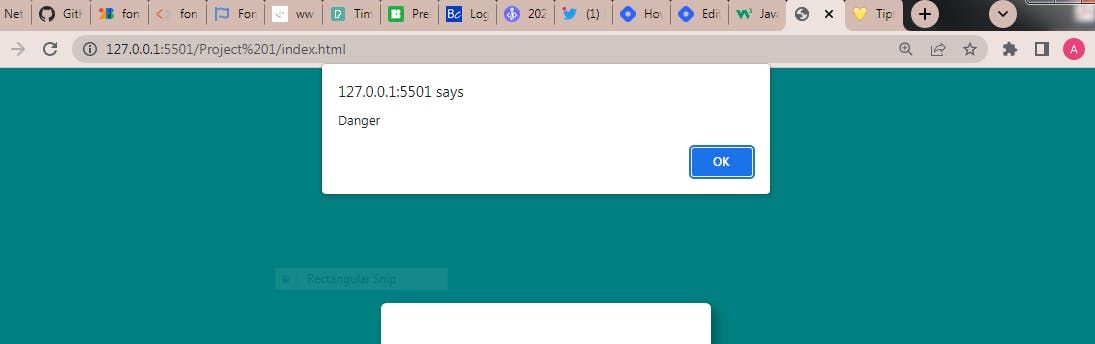
The set timeout method is used to execute a piece of code inside a function just once according to the specified time i.e if the time specified in the code is 1000milliseconds, the code would be executed just once at exactly 1000milliseconds after the browser has loaded, therefore if you run the code below, an alert "danger" pops up in exactly 1sec just once.

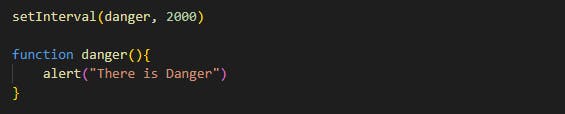
The set interval method is also similar to the set timeout method in theory but the only difference is that it executes the piece of code inside the function continuously after the specified time i.e if the time specified in the code is 2000milliseconds, the code would be executed continuously every 2000milliseconds, therefore if you run this code below, an alert "danger" pops up on your screen every 2sec.
Now let us jump into a very simple code example to demonstrate timing events in Javascript.
In this code example, we would be asked to input an OTP(one-time pin) which has been sent to our email, and failure to do that in 10sec will generate an alert telling us that our time is up and the payment channel has now been closed. Let's go!!!
HTML snippet
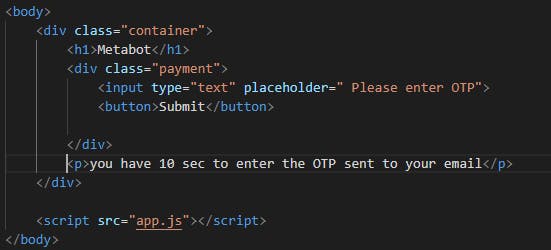
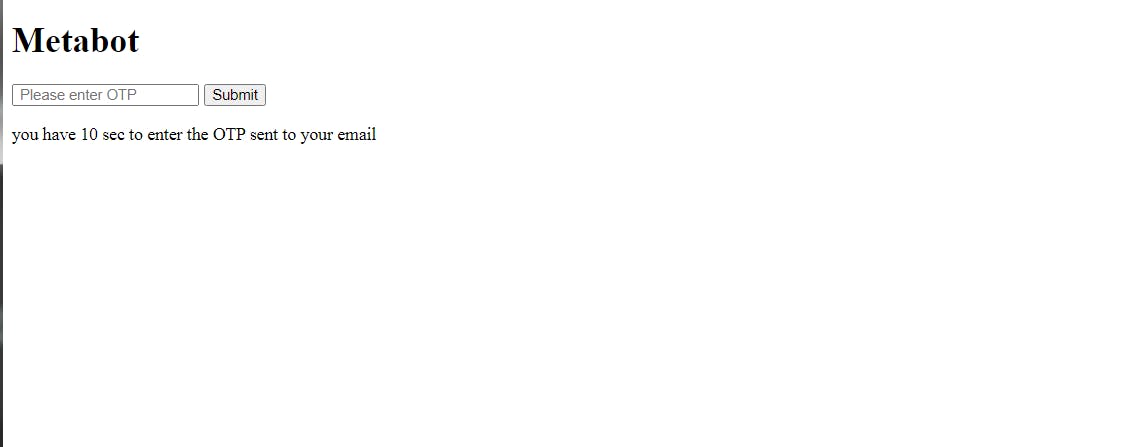
From our HTML snippet above, inside the body tag, we have a container that we use to hold all our elements in place. This is basically all the code we would be needing for this exercise. The output should look like this below:
Now, moving on to the CSS part.
CSS styling
The stylesheet is where we would be adding our different attributes to our HTML code to make it look more presentable/appealing on the website. I expect that we should know how to link our stylesheet to our HTML code already so moving on.
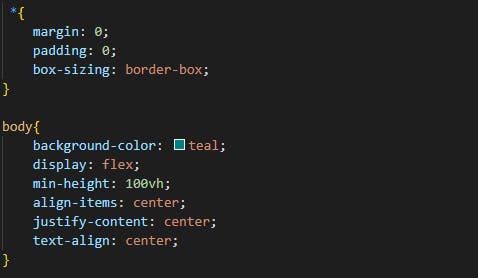
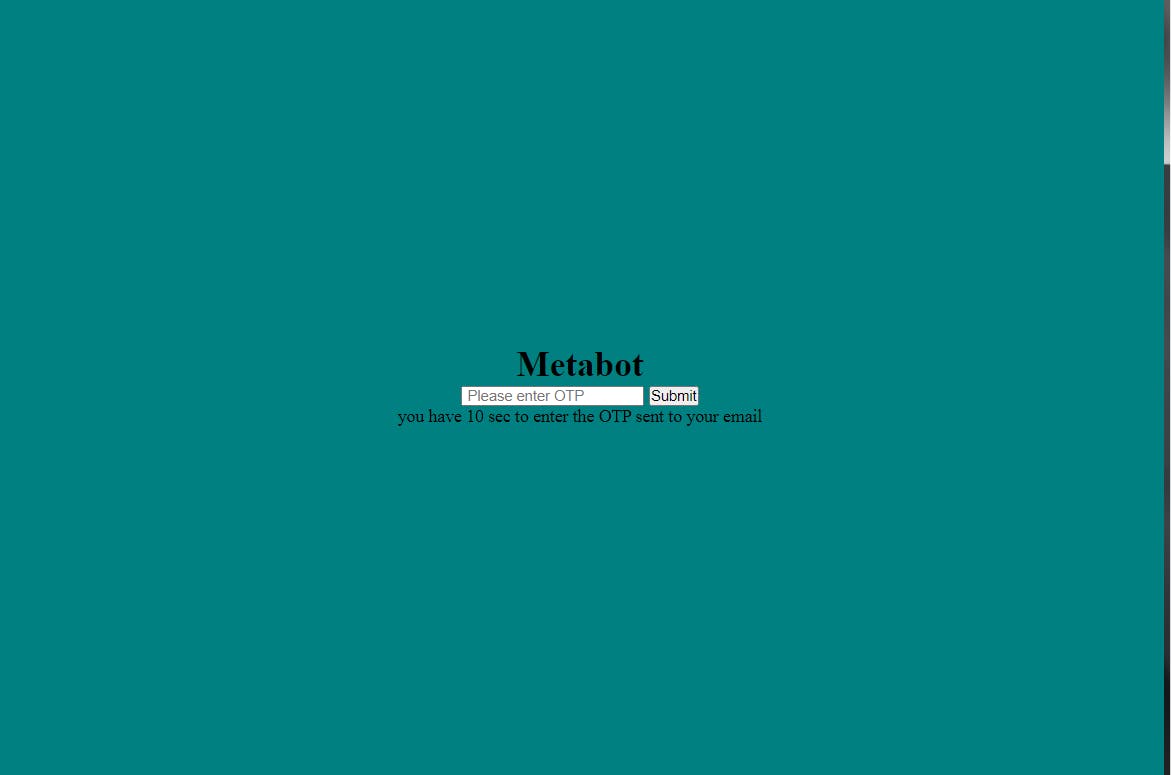
From the above code snippet, we used the universal selector "*" to remove the default margins and padding of the browser. Then we gave the <body> a background color of teal and used flexbox to center our element on the browser. We should have something that looks like this in our browser:
Next, we style our container class:

We gave our container class a background color, height, width, padding, border radius, and also font family. Then we styled our <h1> also giving it a margin-top, margin-bottom, font-weight, font size, color, and letter-spacing also. Next, we styled our .payment class which consists of the <input> and <button> tags giving it a display of flex but also setting its direction to the column so the items can be stacked on one another. At this stage, we should be looking at this in our browser:

Finally, we styled the remaining parts of the page:
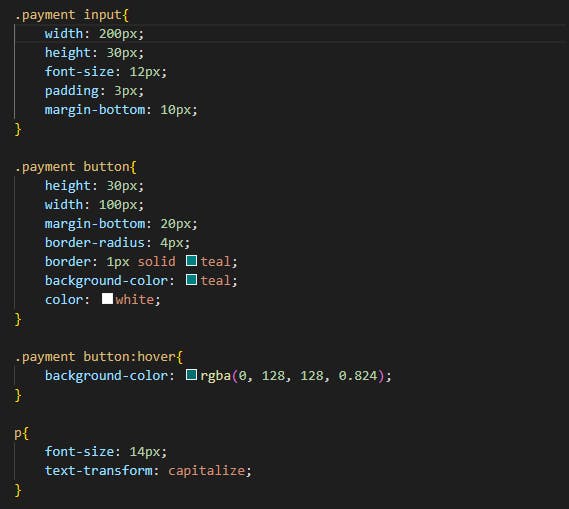
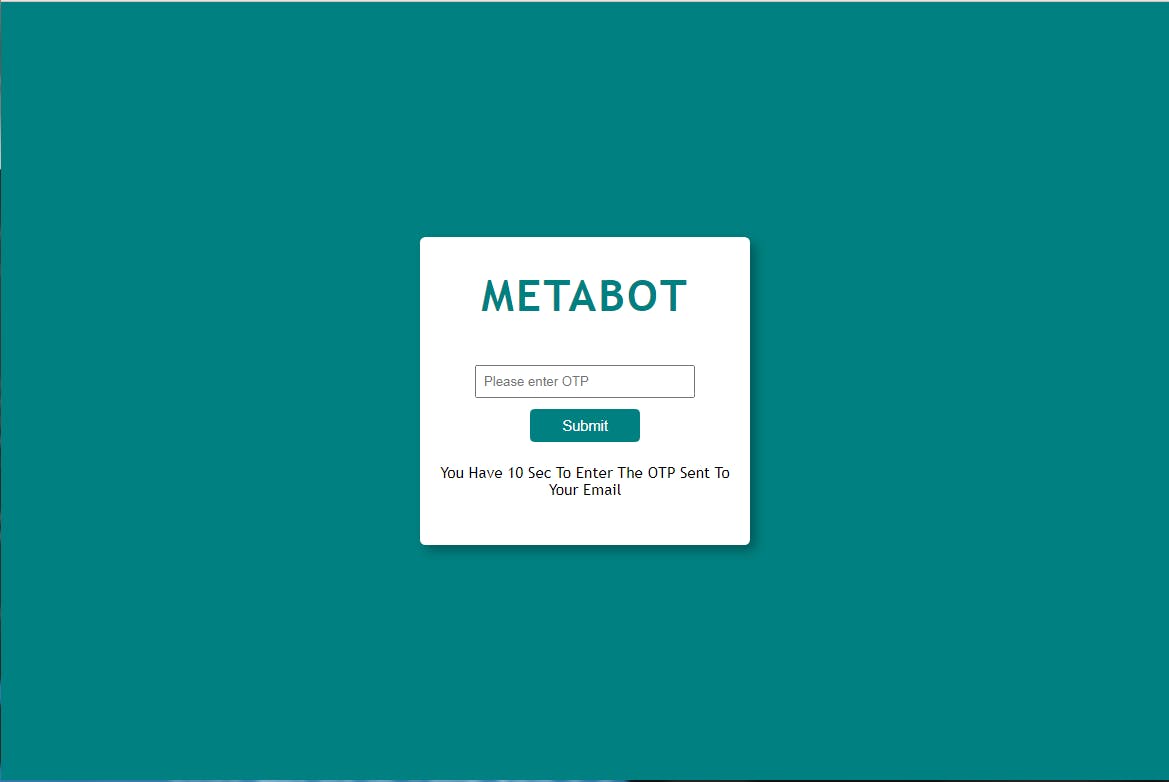
We styled the<input>, giving it a width and height, also padding, margin-bottom, and increasing its font size to 10px. Then we styled the <button> giving it a width, height, margin-bottom, border radius, background color, and also color, we also gave it a hover effect to slightly change the background color whenever a mouse is directly atop it. Lastly, we styled the <p> tag giving it a font size and text-transform to capitalize. Finally, we should have the design below on your screens:
Now, we move to the javascript aspect of our code.
Javascript implementation
Now we have gotten to the main aspect of this article which is the implementation of the timing function consisting of the set timeout and set interval methods. We are going to use both methods to prompt an alert on the screen respectively. It has a very straightforward approach as both methods require just two parameters for them to run effectively. Both methods have been explained earlier on in this article so we would be jumping directly into the code examples.
Set timeout method
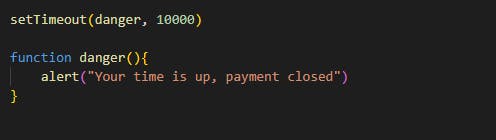
As we can see, the
setTimeoutmethod took in two parameters(a function and a time parameter). After running our code and waiting for 10 secs we should see a pop-up alert on our screen as shown below: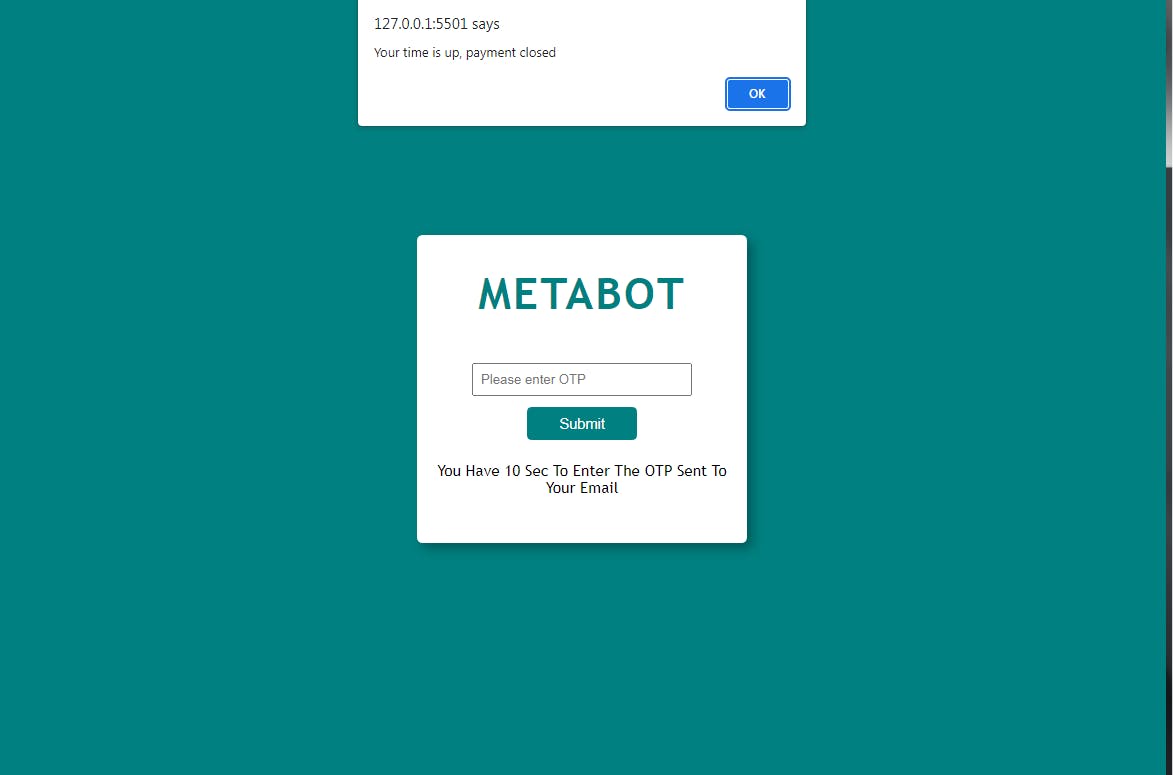
Set Interval method
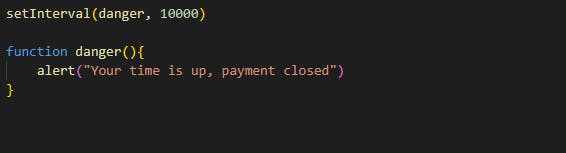
The setInterval method also took in two parameters(a function and a time parameter), but the difference is that after running our code, we should see a pop-up alert on our screen as shown below every 10sec.

NOTE:
We also have a separate method called clearTimeout or clearIntervalwhich can be used to stop the function before its execution.
Conclusion
We have finally gotten to the end of this article and I hope you have all learned something and the article was worth your read. Readers who find this article valuable are encouraged to show their support by following the author and providing feedback in the comments section, including suggestions or corrections to improve the content. Thanks for reading.